


During the last few months, my grandkids have been pretending to go ‘shopping’ when they are playing at my house. They will push the grocery cart to me and expect me to ring up all of the items and bag them up (I had a few small paper bags they would use)… That is what gave me the ideas of making these pint-sized grocery bags.
[wp_ad_camp_1]
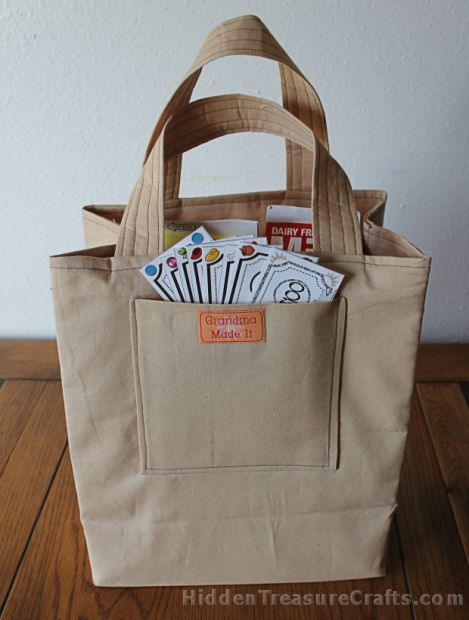
These personalized grocery bags will be filled with pretend groceries and given to them for Christmas along with a toy cash register (I had to try to find something that could compete with the dress-up clothes wardrobe we made last year). I was going to make each of them a wallet to hold their grocery money, but instead I decided to put a pocket on the back of the grocery bag.
I will do my best to share how I made them. I am not sure why I took pictures of some of the process but not others, so I will try to fill in the blanks with simple illustrations.
Supplies Needed to Make a Personalized Grocery Bag:
- Tan Muslin (1 yard should be plenty)
- Stiff Interfacing (1 yard should be plenty)
- Thread
- Fusible Web
- Grandma Made It Iron-On Labels (optional)
- Money and Pretend Food (see my suggestions below)
Tools Needed:
- Iron
- Ironing Board
- Mat
- Rulers
- Rotary Cutter
- Sewing Machine
- Pen
- Scissors
- Straight Pins
The first thing you will want to do is iron your muslin and fabric. Muslin does have a tendency to wrinkle up, which is okay because the finished product is supposed to look like a paper grocery hag!
Start out by cutting the muslin and interfacing.
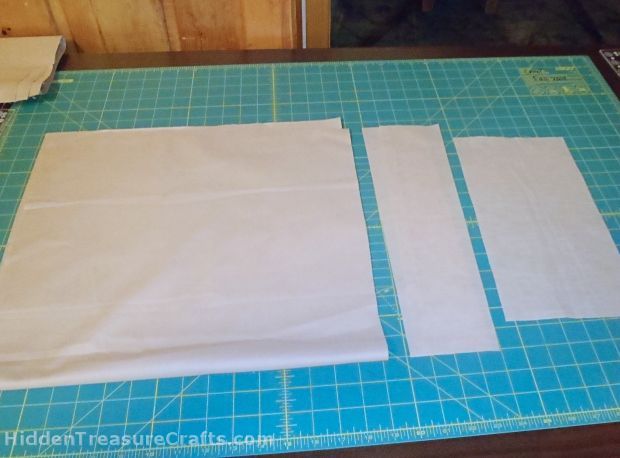
From the muslin, cut:
- Bag exterior and lining – Cut two 30″ x 16″ piece
- Pocket – Cut one 12″ x 6 1/2″ piece
- Handles – Cut two 14 1/2″ x 3 1/2″ pieces
From the stiff interfacing, cut:
- Bag – Cut one 30″ x 16″ piece
- Pocket – Cut one 5 1/2″ x 5 1/2″ piece
- Handles – Cut two 14″ x 3″ pieces
Sew the lining of the bag:
Lay one of the 30″ x 16″ pieces of muslin on your ironing board. Lay the 30″ x 16″ piece of interfacing on the muslin and press it so it sticks. Fold it in half (right sides together – interfacing out), press, and sew up each side using a 1/2-inch seam allowance.
 Now, grab your ruler and measure 3-inches up from the bottom of the bag and 3-inches in from one of the sides. Mark these lines using a pen. do the same on the other bottom corner. Cut the corners you marked off.
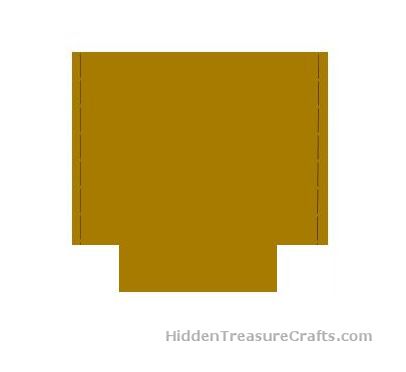 Now, this part may sound a little tricky but it is very easy. Pick up the bag and pinch the section you cut into a straight line by lining up the side seam and the bottom center line you pressed earlier. Sew along the pinched edge, using a 1/2-inch seam allowance. Repeat this for the other corner.
 This is what your finished lining will look like. Set it aside while you work on the exterior of the bag.

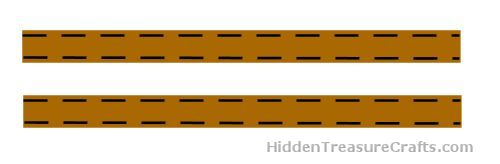
Sew the handles:
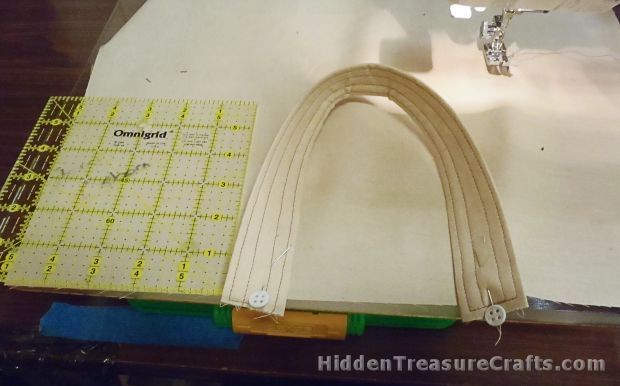
Lay the two 14 1/2″ x 3 1/2″ pieces you cut for the handles on your ironing board. Center the two 14″ x 3″ pieces on them, adhesive side down, and press them in place using the iron. Fold in the fabric about a 1/4-inch on both long sides of each handle and press. Now, fold the handle in half, right sides out, and press. Sew along each long edges of the handle (I ended up sewing the length of the handles two more times mainly because I liked the look of it)
 Set the handles aside for the time being.
Sew the pocket:
The exterior of the grocery bag is made almost the same way as the lining with the main differences being that you will not be ironing on any interfacing and you will be sewing on a pocket.
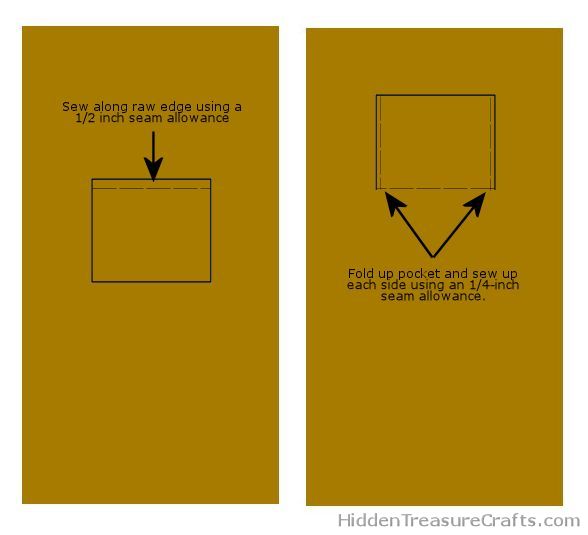
Lay the 12″ x 6 1/2″ pocket piece on your work surface. Fold it in half so the wrong side of the fabric is facing out and sew up both sides. Clip the corners, being careful not to cut into the seam, and then turn the pocket right side out. Press the pocket. Slip the interfacing into the pocket and press it.
Now lay the 30″ x 16″ exterior piece or fabric of your work surface, right side facing up. Lay the pocket on top of the exterior piece or fabric. Measure down 8-inches from one of the shorter edges of the grocery bag exterior. Set the pocket down along the ruler edge so that the unsewn edge of the pocket is parallel to the short edge of the fabric. Make sure the pocket is centered, which should put it about 5 inches away from each of the long sides of the bag.
Pin the pocket in place and sew along the raw edge using a 1/2-inch seam allowance. Fold up the pocket and press. Sew up both sides of the pocket using a 1/4-inch seam allowance.
Sewing the exterior of the bag together:
Before you sew the exterior together, you need to get the handles in place. Lay the bag exterior down on your work surface, right side up, on your work surface. Lay the ends of one of the handle pieces along one of the short edges of the bag exterior. Measure and pin the handle about 5-inches away from the side of the bag. Put a few stitches through each handle end to hold them in place. Do the same with the other handle.
You can now fold the exterior piece in half, right sides together, and press. Make sure the handles are folded inside the bag. Sew up each side just like you did with the lining piece. Box the bottom of the exterior of the bag the same way you did the lining.
Sew the exterior of the bag to the lining:
Turn the exterior bag right side out. Slip it inside the lining so that the right sides are together. Pin the top edges together (the handles should be sandwiched between the lining and the bag exterior). Sew around the top edges, using about a 1/4-inch seam allowance. Leave about a 3- to 4-inch opening so you can flip the bag right side out.
Flip the bag and lining right side out, push the lining into the grocery bag, and press. Sew around the edge of the top of the bag using a 1/4-inch seam allowance. This will close the hole you left for turning. The bag itself is now done and you can work on some of the finishing details!
Personalizing the grocery bags:
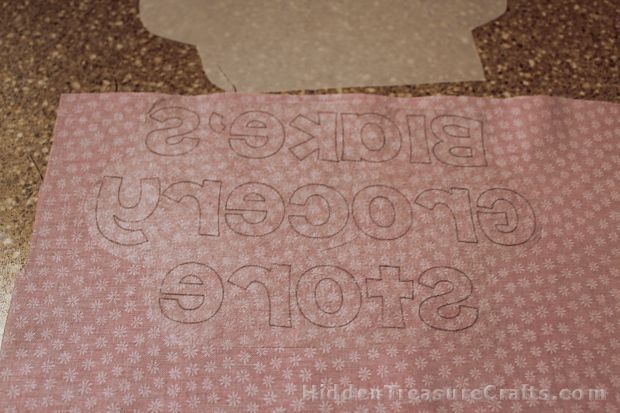
I decided to applique each grocery bag for my grandkids using different colored fabric. While I originally considered trying to use my Cricut to cut out the letter from the fabric, in the end I decided to try printing out the letters onto interfacing using my computer and printer. Previously, I had traced the letters onto the interfacing.
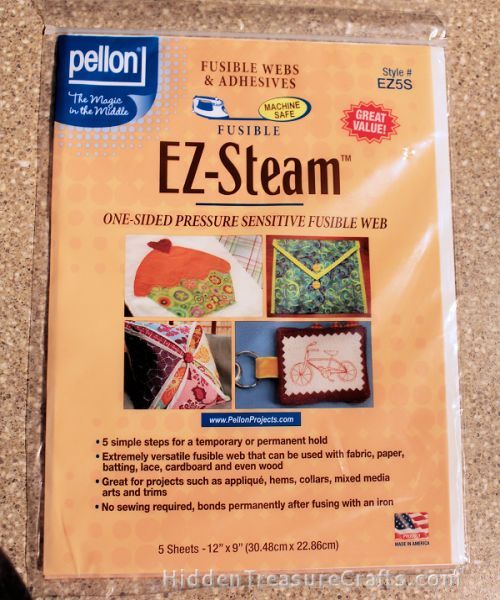
The first thing I did was some searching on Amazon. That is where I found these Pellon EZ-Steam sheets (affiliate link). I did have to trim them down to fit into my printer, but once I did that, it worked perfectly.
I open a file that was 11″ x 8″ and typed out the words I wanted. I them flipped them so they were backwards. I then printed them out onto a sheet of the EZ Steam.
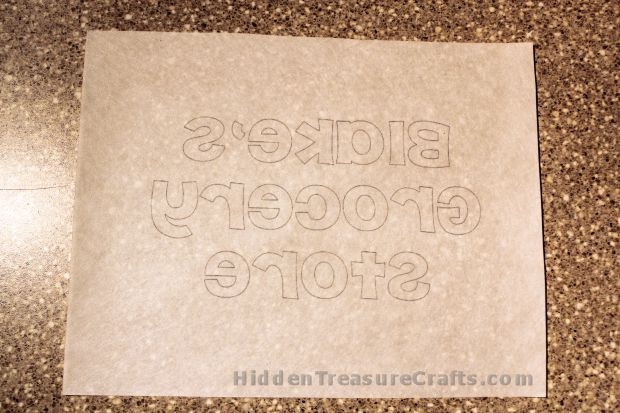
I then stuck the adhesive side of the fusible web to the fabric and removed the paper backing.
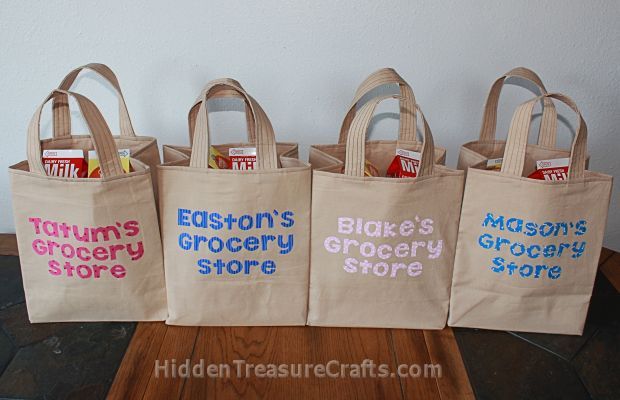
The letters can then be cut out and ironed onto the bag. The words will be ironed on to the side opposite of the pocket.

Now flip the bag over and iron on the Grandma Made It Labels (affiliate link) if you like.
I didn’t just want to give them a boring old grocery bag so I filled them with groceries. I bought Melissa & Doug Grocery Cans (affiliate link) and Melissa & Doug Fridge Groceries
(affiliate link) to put in the bag. I found same amazing play money online that featured Disney characters (you can print your own from Wish Upon a Star with Jennifer). I printed it out on heavy paper and decided to laminate it so it would last longer. I cut them out and slipped them into the pocket.
Once all four were done, I was tickled pink with how they turned out… What do you think?
Disclosure: As noted above, this post contains affiliate links. See my disclosure policy for details.
Shared as part of Bewitch Me & Titi Party at Titi Crafty, DIY Sunday Showcase at Pink When, Share It Sunday at Denise Designed, The Sunday Showcase at By Stephanie Lynn, Clever Chicks Blog Hop at The Chicken Chick, A Round Tuit at Creating My way to Success, Craftastic Monday Link Up at Sew Can Do, Inspiration Monday at I Should Be Mopping the Floor, Inspire me Monday at Create With Joy, Mix It Up Monday at Flour Me With Love, Monday Funday at Uncommon Designs, Motivate Me Monday at Keeping it Simple, Project Inspired at Yesturday on Tuesday, Mad Skills Monday at Mad in Crafts, Made by You Mondays at Skip to My Lou, Tip Me Tuesday at Tip Junkie, Treasure Box Tuesday at Memories by the Mile, Caffeinated Crafters Tuesday Link Party at Artzy Creations, Take a Look Tuesday at Sugar Bee Crafts, Too Cute Tuesday at Funky Polka Dot Giraffe, Fluster’s Creative Muster Linky Party at Fluster Buster, From Dream to Reality at The DIY Dreamer, Project Parade at This Silly Girls Life, Wake Up Wednesday Link Party at A Peek into My Paradise, Whimsey Wednesday at Simply Designing, Wonderful Wednesday Blog Hop at Ducks in a Row, Wow Me Wednesday at Ginger Snap Crafts, Wow Us Wednesday at Savvy Southern Style, Your Whims Wednesday at My Girlish Whims, Show and Tell Wednesday at SNAP Creativity, Whatever Goes Wednesday at Someday Crafts, Inspire Me Wednesday at Seven Thirty Three, Create it Thursday at Lamberts Lately, Moonlight and Mason Jars at The Newlywed Pilgrimage, Live Laugh Linky at Live Laugh Rowe, Showcase Your Talent Thursday What’s Cooking Love, Catch a Glimpse Party at A Glimpse Inside Blog, Crafty and Delicious Party at Sweet Bella Roo, Craft Frenzy Friday at Craft Dictator, Creativity Unleashed Link Party at Shaken Together Life, Friday Favorites at Simply Sweet Home, Friday Link Party at The Pin Junkie.
2 thoughts on “Personalized Grocery Bags for Play”
Comments are closed.