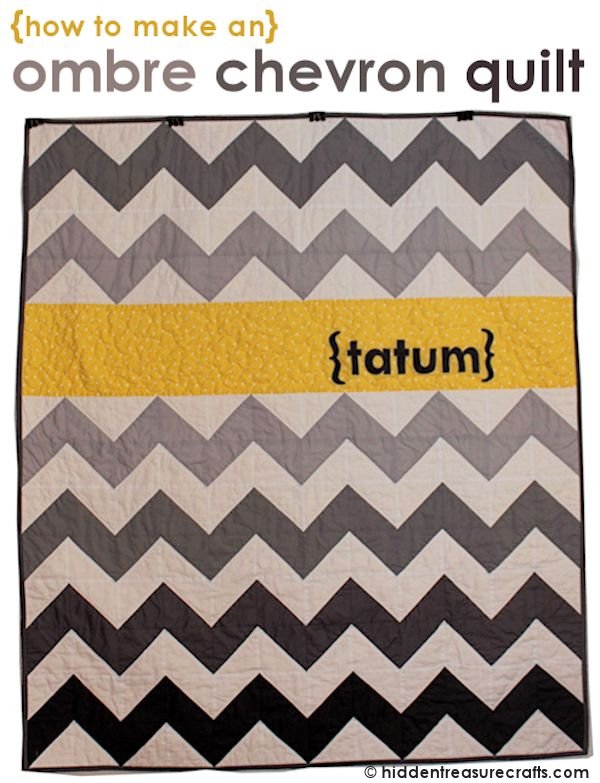
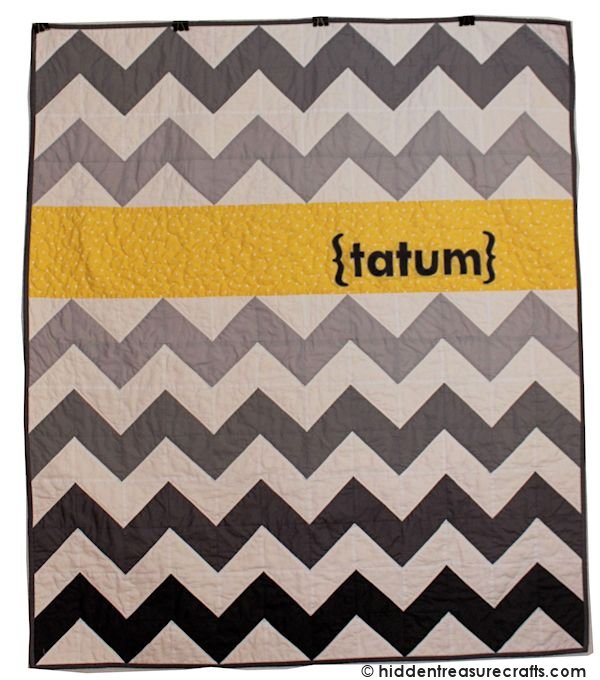
I designed this quilt pattern for my 4th grandchild – Tatum! She was born in January 2013. At that time, my daughter Katie (Tatum’s mom) was really into yellow and gray so that is how I chose the colors. I chose the design because I had been itching to make a quilt using half-square triangles, plus chevron was just starting to get really popular.
[wp_ad_camp_2]
I will do my best to share how I made it here. This includes the amount of fabric you will need. Please keep in mind I just bought large amounts of each color because I sort of created it as I went along so I came up with the yardage requirement by doing a little math and a lot of educated guessing.
Fabric Needed:
- 1/2 yard lightest gray fabric
- 1/2 yard medium-light gray fabric
- 2/3 yard medium-dark gray fabric (includes yardage for binding)
- 1/2 yard dark gray fabric (includes yardage for name applique)
- 1 1/2 yard white fabric
- 1/2 to 1 1/2 yard yellow fabric (see my notes below about yardage)
All of the measurements for the fabric amounts about will leave you with a very small amount of scraps, so be careful how you cut or buy extra! This is true for all colors except the yellow. This piece is a little tricky because it is 48 1/2-inches wide and 8 1/2-inches tall. I ended up getting a yard and a half cut so I could cut the long pieces from the length of the fabric instead of piecing it. If you don’t mind piecing the yellow, you will only need around a 1/2 yard.
Cutting the Fabric for the half-square triangles:
Cut 24 – 4 7/8-inch squares from the lightest gray and the medium light gray fabrics.
Cut 12 – 4 7/8-inch squares from the medium-dark gray and dark gray fabrics.
Cut 72 – 4 7/8-inch squares from the white fabric.
Assembling the half-square triangle blocks:
All of the blocks are assembled the same way. Start by marking a diagonal line on the back side of all of the white squares.
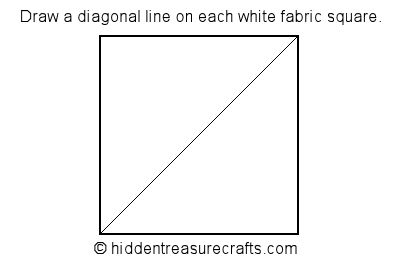
Lay a white square on top of a gray square, RST (Right Sides Together). Sew along each side of the line, a 1/4-inch from the line (indicated by the red dotted line). Cut along the drawn line.
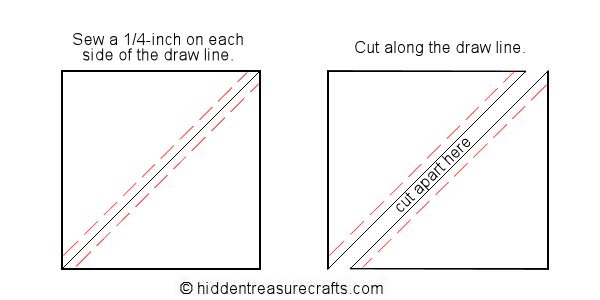
You will now have 2 half-square triangles block. Open them up and carefully press the seam to the dark side.
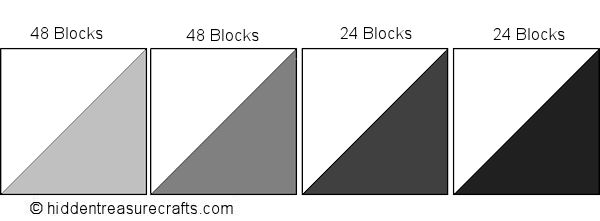
Repeat this until you have used all of the white and gray squares. You will have 48 blocks of white and the lightest gray fabric and also the white and medium-light fabric. You will have 24 blocks of the white and medium-dark gray fabric and also of the white and dark gray fabric. These blocks should all be about 4 1/2-inches square.
Preparing the Yellow Fabric:
I touched on this above… The yellow area on the quilt I made was 48 1/2-inches x 8 1/2-inches. Since most bolts of fabric are about 44-inches wide, to be able to make this piece without any seams, you need to buy 1 1/2 yards of fabric. Whether you decide to piece your yellow fabric or cut it from one piece, you should make sure the measurements of the final piece are correct.
Once the yellow strip is the required size, you can work on the applique. I used my computer to print out Tatum’s name and the {braces}. The font size was probably set at 200 – 300. I am not 100% sure which font I used, but I think it was Century Gothic.
Print out the desired letters. Tape the printed pages to a window or a light box so that all of the letters are backwards. Hold some fusible web over the letters and trace them. The traced letters can then be ironed onto the back (wrong side) of the fabric.
Once the fabric and the paper on the fusible web cools, cut out each letter and remove the paper backing. Position them on the front (right side) of the fabric where you want them and iron them down. Let them cool.
Finally, you should stitch around the letters to secure them. I used a small zig-zag stitch on my machine. If you prefer, you could use a blanket stitch and sew it by hand.
Sewing the Rows:
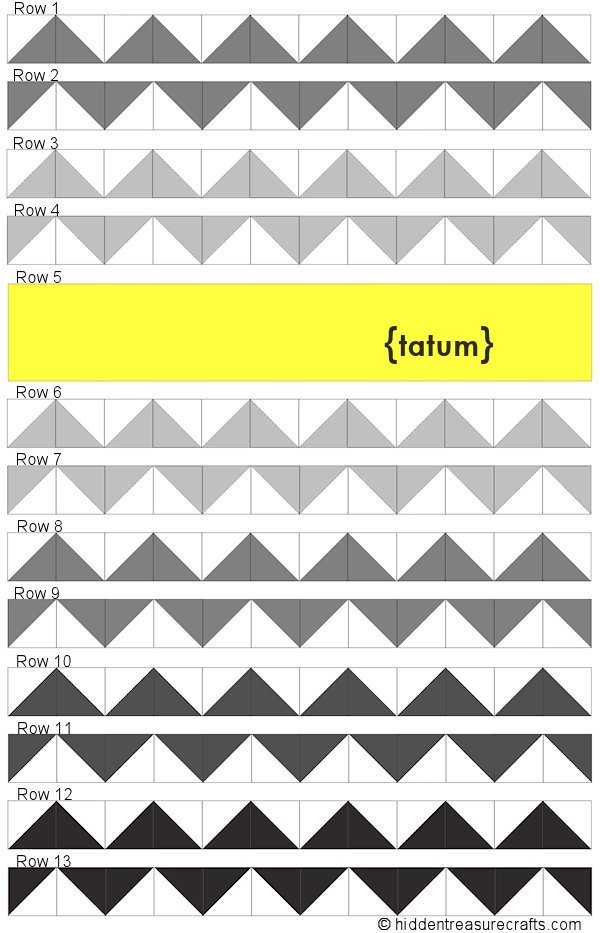
You will be sewing 12 rows using the white and gray blocks. You need to rotate each block to be a mirror image of the one next to it to form the final chevron design. Use this image as a guide to make your rows—
Did you notice there are 13 rows on this image, not 12? We can’t forget the appliqued yellow strip!
Putting it All Together:
Now all you need to do is sew all of the rows together. I used straight pins to match up the seams. Watch the chevron points while you are sewing.
When it came to the quilting, I layered the finished quilt top on 100% cotton batting and a yellow chevron fabric backing. I stitched in the ditch (aka followed the seam lines) around all of the chevrons. I meandered in the yellow fabric, making sure to stitch around the name and braces.
I hope you enjoy making this quilt as much as I did. Please let me know if you find any discrepancies with the pattern or the amount of fabric needed.


I love this pattern… It looks so simple yet so elegant even. I bet the little one who got it will treasure it.
Thank you so much for the pattern, I’ve been looking for this, it’s perfect! I love your colors too!