


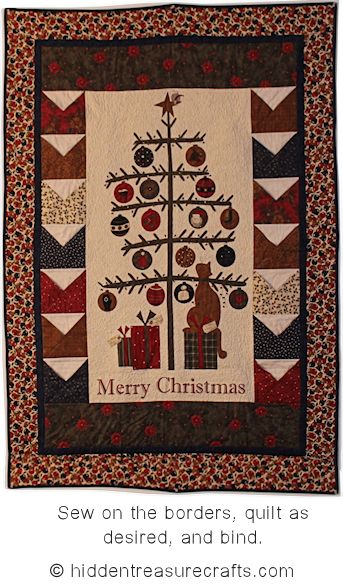
Do you have a creative way to display Christmas cards? I used to collect them all in an adorable little sled I had until I made this Christmas-themed wall hanging. It is made with a holiday panel that is bordered on each side by 7 pockets.
[wp_ad_camp_3]
There was no commercial pattern for this quilted wall hanging. It came with a sheet of directions with the fabric I bought at a quilt store. I can’t find the pattern page or even a similar one online so I will do my best to explain how I made it.
Fabric Needed to Make this Christmas Wall Hanging:
- 1 Christmas Panel (something that about 42” tall)
- 5/8 yard piece for the pocket backgrounds
- 1/4 yard cuts of 7 fabrics for the pockets
- 3/8 yard piece for top and bottom border
- 1/4 yard piece for thin inner border
- 3/4 yard piece for outer border
- 1/2 yard piece for binding
Cutting the Fabric:
Trim your panel so it is 42-inches tall. The width of my panel was about 2 feet wide. Yours can be bigger than this if you like, just keep in mind you might need more fabric for all of the borders and binding.
For the background of the pockets, cut 3 strips that are 6 1/2-inches wide by WOF (width of fabric). Cut these strips so you have 14 6 1/2-inch squares.
Out of each of the 7 pocket fabrics, cut four 6 1/2-inch squares so you have a total of 28 squares.
For the top and bottom border, cut 2 strips that are 6 1/2-inches wide by WOF.
For the inner border, cut 5 strips that are 1 1/2-inches wide by WOF.
For the outer border, cut 6 strips that are 4 1/2-inches wide by WOF.
For the binding, cut 7 strips that are 2 1/2-inches wide by WOF.
Assembling the Quilt Top:
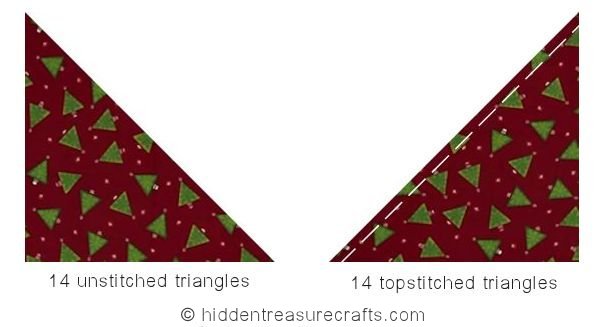
Fold each of the 28 pocket squares in half, with the right side of the fabric out, to form a triangle. Carefully press the edges. Top stitch 1/4 of an inch from the folded edge on two triangles of each color. This will leave you with 14 triangles stitched and 14 not.
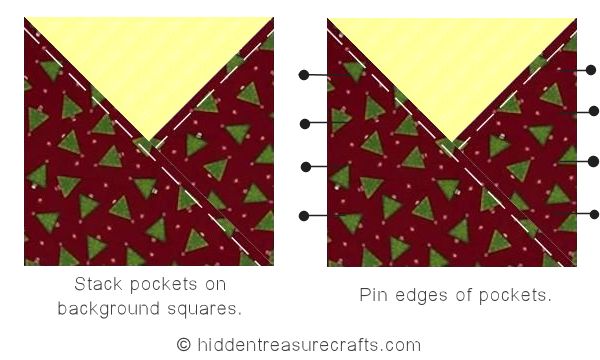
 Lay one of the unstitched triangles on top of one of the topstitched triangles of the same color (refer to the image below). Topstitch a 1/4 of an inch from the folded edge of the top triangle. This will attach the two triangles together to form the front of the pocket. Continue this so you have 14 pocket pieces, two of each color.

Stack the 14 pocket pieces you assembled on top of the 14 background squares you cut. Match the inside of the pocket with the right side of the background fabric. Use straight pins to hold the pocket pieces to the background piece. If you prefer, you can baste each side.
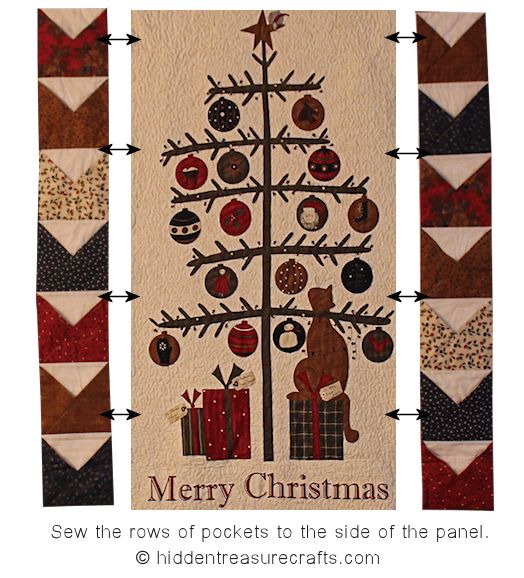
Sew 7 pockets of different colors together, top to bottom, to make a row of pockets. Make two rows in this manner.
Sew the 2 rows of pockets to either side of the panel.
 Measure the width of your quilt top now that the pockets are sewn on. Measure across the top, the bottom, and through the middle to come up with an average size. Cut the top and bottom border pieces to this length and then sew them in place. If you prefer, you can simply sew the pieces on and then trim them to size.
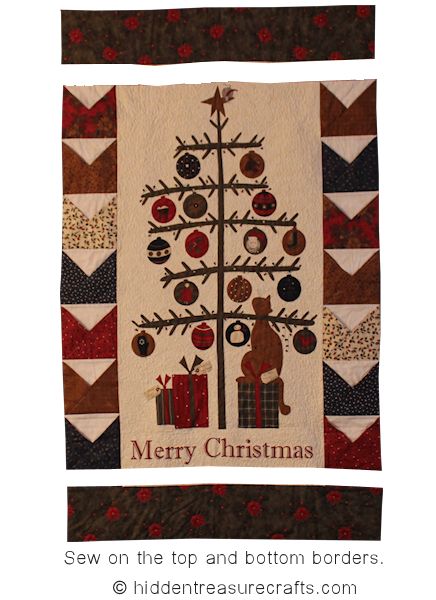 Now you can sew on the inner and out borders. You can measure them to size and sew them on, of sew them and trim – whichever method you prefer.
Quilt as desired, making sure not to stitch over any of the pockets. Bind the quilt with the 2 1/2inch fabric strips you cut. You may want to sew a sleeve onto the back of the quilt for hanging.
I like this wall hanging. I think I will pin in so I can work on it for next Christmas.